Main Screen
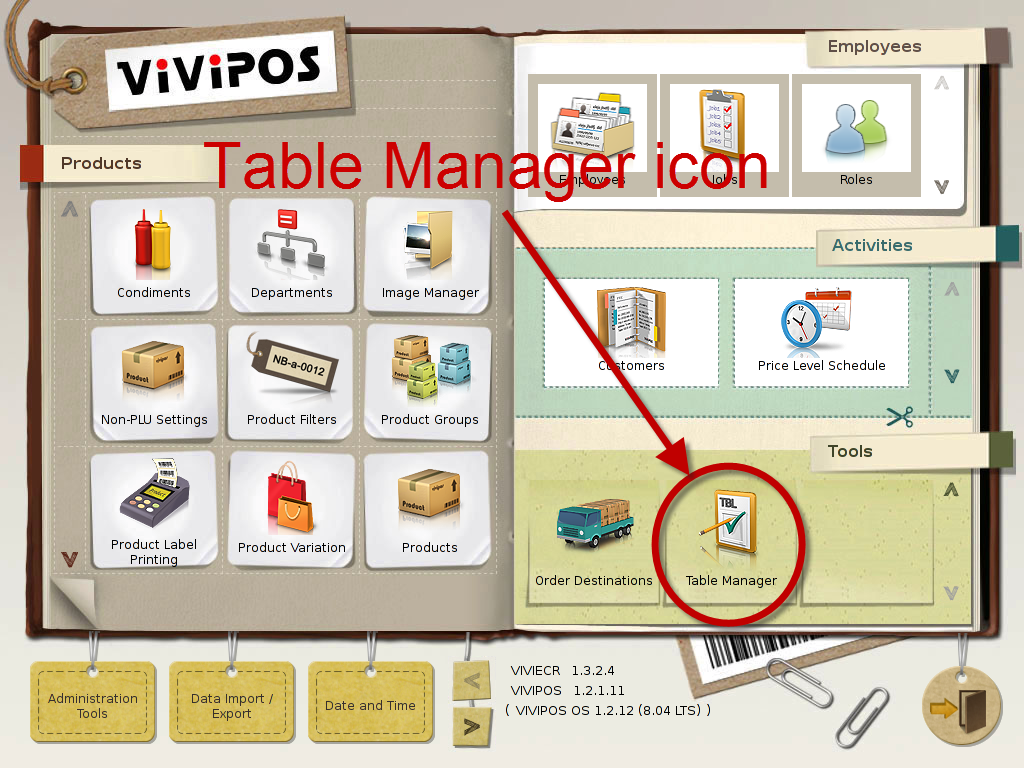
Control Panel
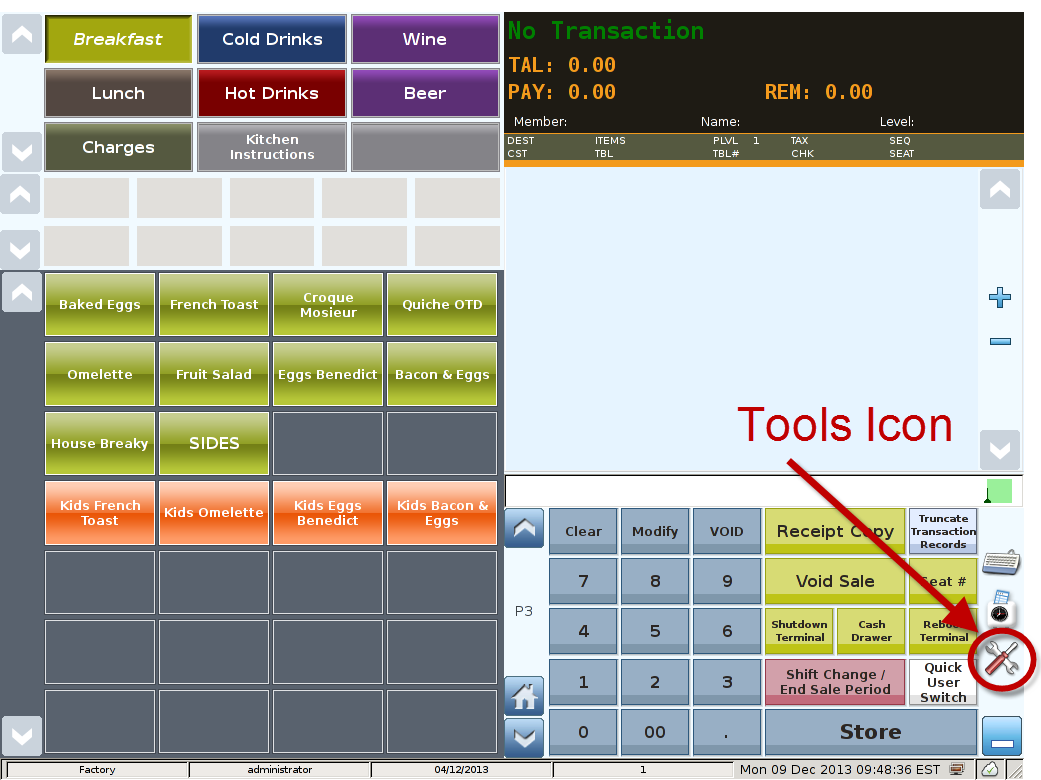

Select 'Tools' icon
to enter the Control Panel

Select the 'Table Manager' icon
to enter the Table Manager Area
Table Manager Area
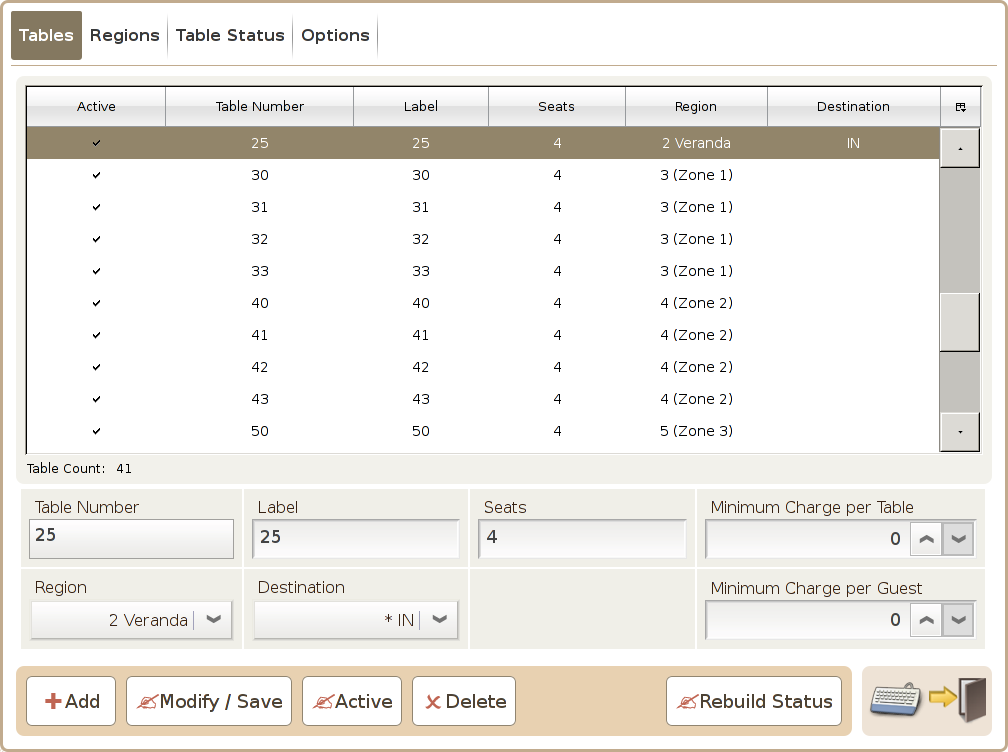
You will most likely want to utilize this module if your business is in the restaurant sector and require the use of a table manager. There are 4 tabs of configuration in this module. The Tables tabs will show a list of tables set-up in the system as illustrated by the below screen capture:
Tab 1(Tables)
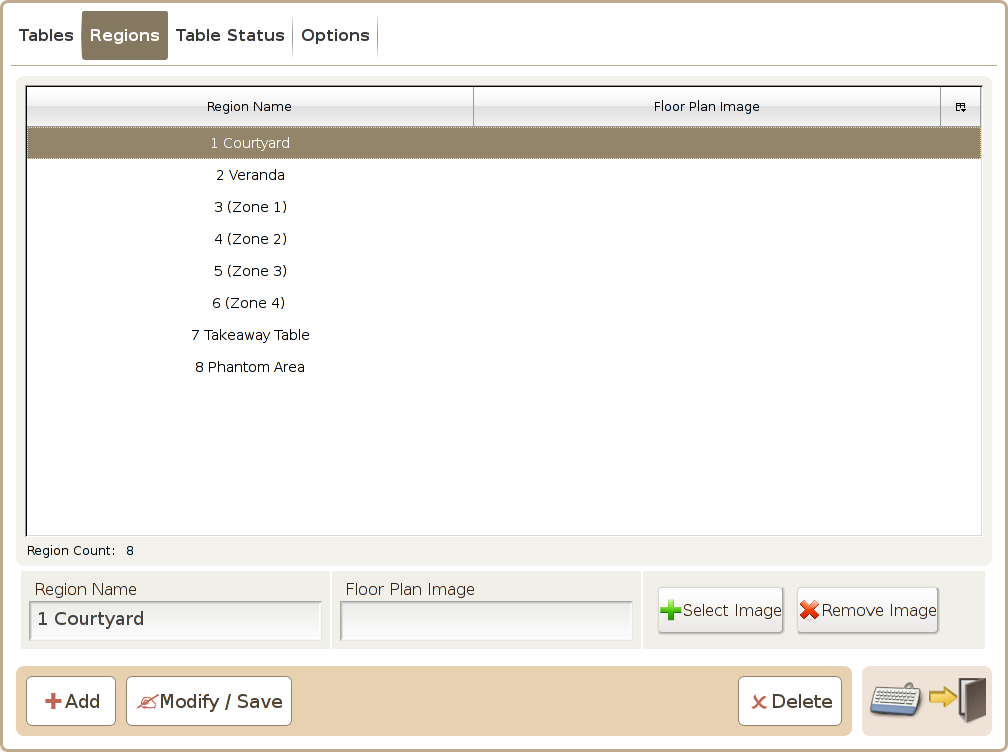
Tab 2(Regions)
Default : Mark if a destination is to be used as the default value.
Destination: Set the destination code here, which will can used as the parameter for the function "Set Destination".
Prefix: Shown in the register screen as the prefix / purpose of the this order destination.
Tax: You can configure different tax to be applied base on the order destination.
Price Level: You can configure different price level based on the order destination.
Add button: Press this to add a new destination.
Modify / Save button: Press this to save the modification on an existing order destination.
Delete: Press this button to delete and existing order destination.
Set as Default Button: Press the Set as Default button to mark a destination as default. Please note that a destination must be selected first for this button to appear on the screen.
Region Name: You can set different regions
Floor Plan Image: Display current region's background picture (this function is currently not
activated)
Add:Can add your own defined Region
Modify/Save:Save the change you made on the region
Delete:Delete the region
- When the machine is used in a networked environment for the table management module,and the table service host is not set to "localhost", the system will prevent Add, Modify and Delete function.
Tab 3(Table Status)
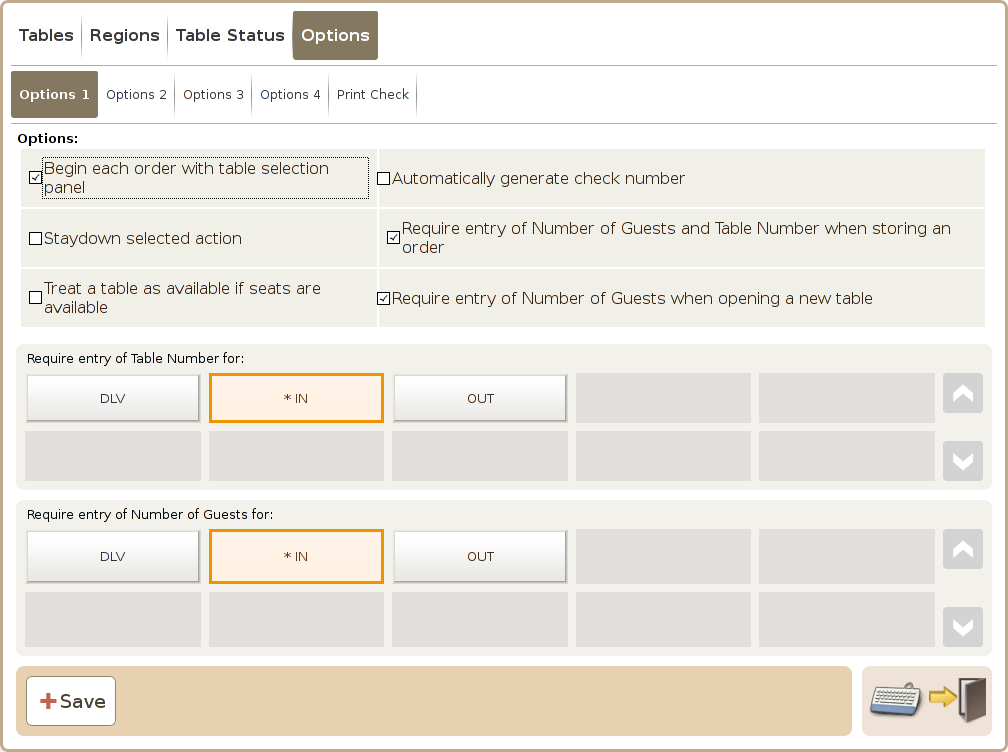
Tab 4a(Options 1)
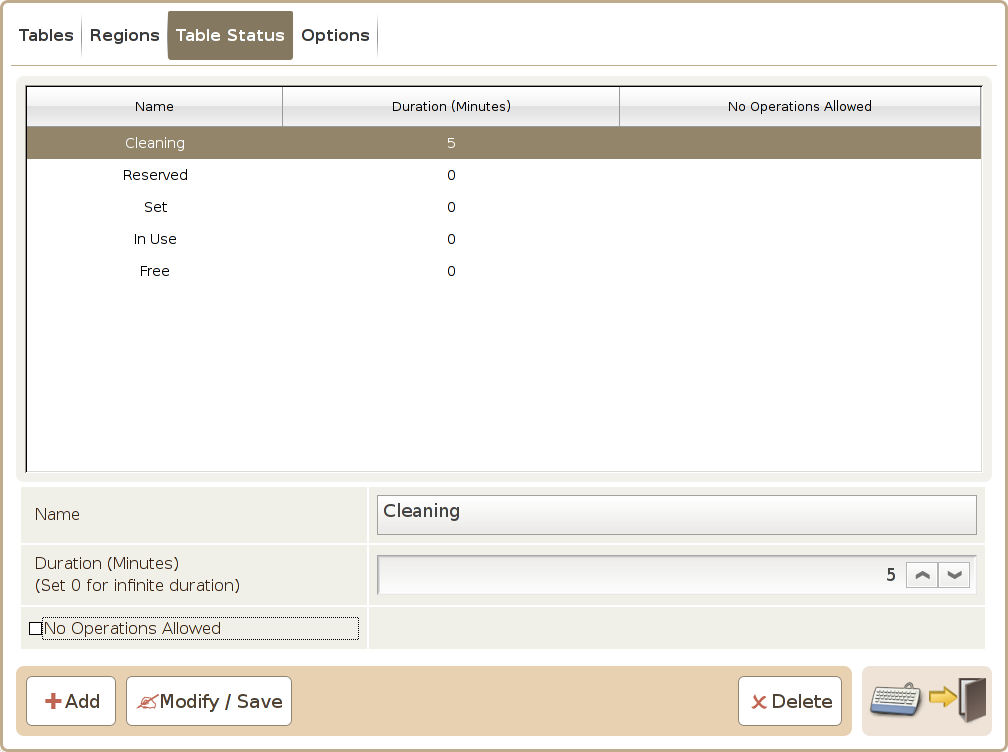
This screen enable you to set different status for a table such as “Reserved”, “Cleaning”, “Closed” etc.
Name: Define Table Status such as Reserved or Cleaning
Duration: Can set the time the table will remain in a particular status, for example you may set 5-10 minutes for cleaning status.
No Operation Allowed: If you enable this option, you can prevent the table to be operated at all, when it is in this particular status.
Add: Used to add new Status
Modify/Save: Save Modified Information
Delete: Delete the status
- In a networked synchronized environment, and the terminal is not the master, e.g. table host server is not localhost, the system will now allow you to add, modify or delete of status.
This screen allows you to set the parameters related to table management. There are 5 sub screens in this configuration page.
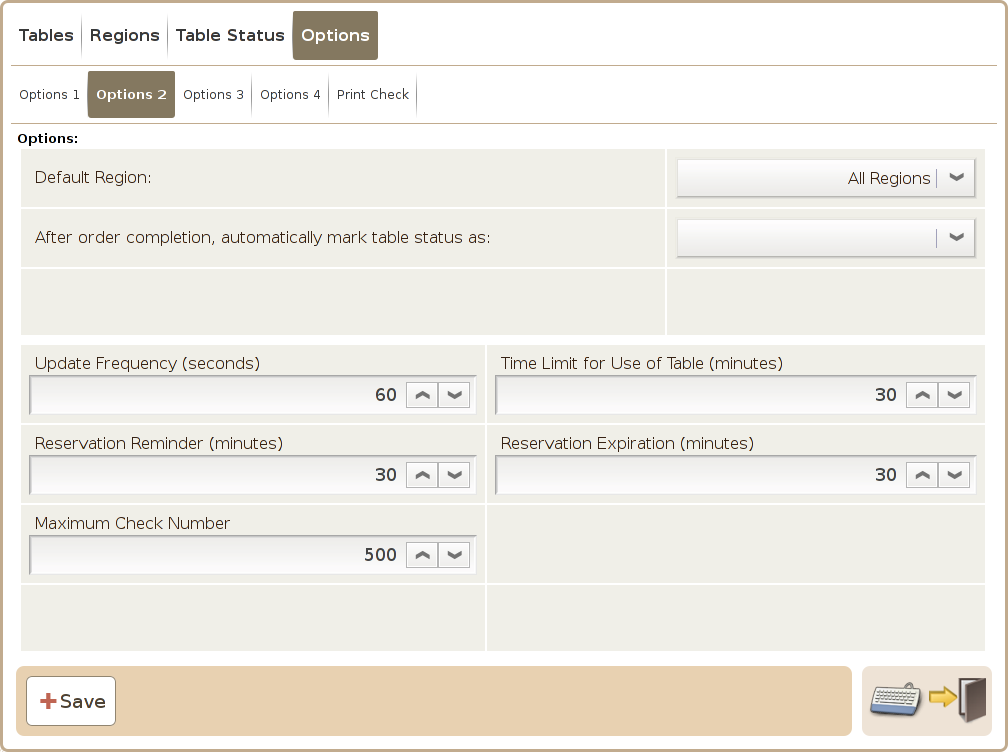
Tab 4b(Options 2)
Tab 4c(Options 3)

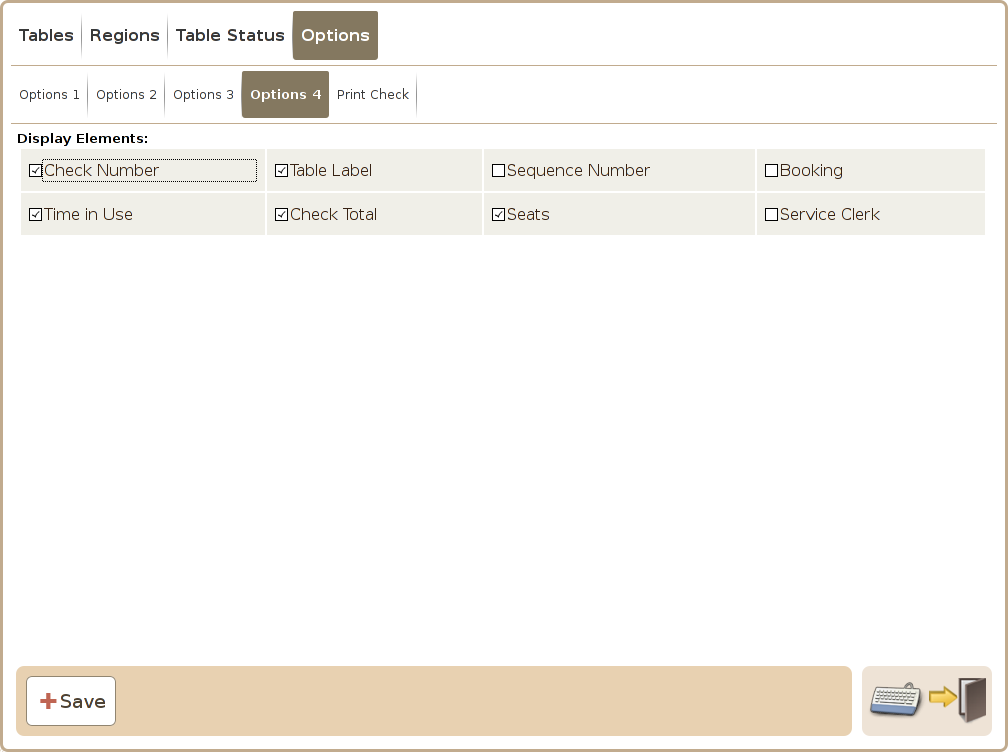
Tab 4d(Options 4)
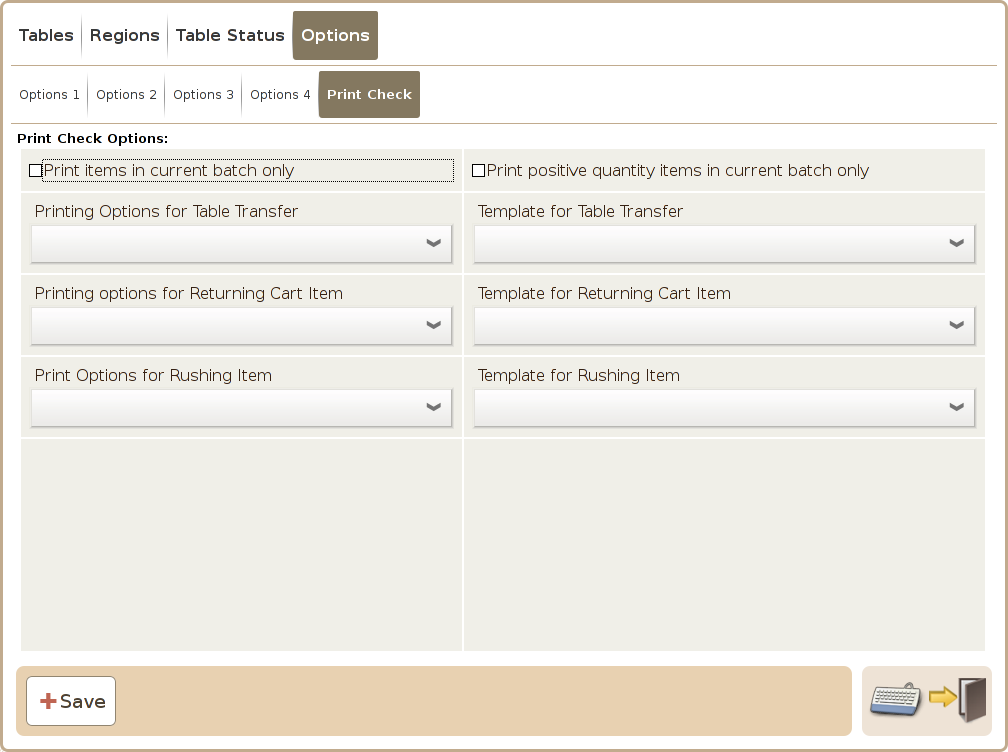
Tab 4e(Print Check)