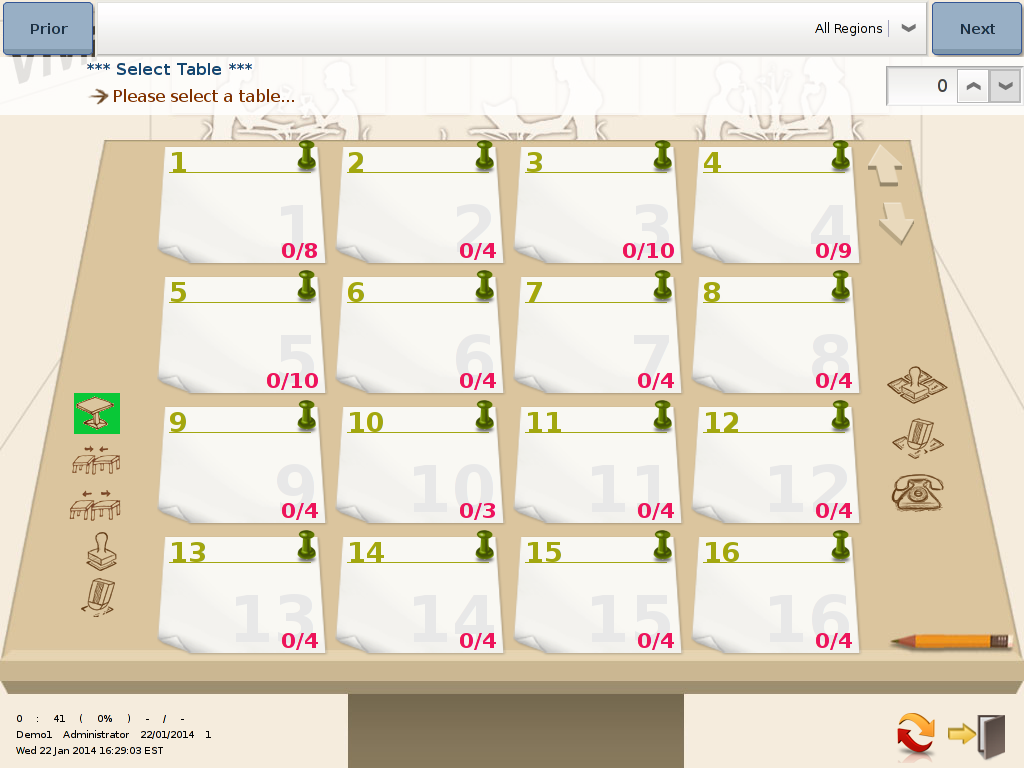
Table Screen Overview
The image below shows the main table screen.
This screen is looks a bit like a lectern with post-it notes for each table attached.
Only Business' offering dine-in service will use this module of the ViViPOS program.
There are three main areas on this page:
- Regions: the areas/zones in your restaurant (like a waiter’s section)
- Tables: the tables assigned to regions
- Activity Icons: used to select tables, merge tables, split tables, mark table status & unmark table status.
Within the tables are stored:
- Checks: the account/tab for each table (there can be multiple checks if you offer bill splitting)
- Orders: The menu items stored for the kitchen to make (there can be multiple orders per check eg entrees, mains & desserts might be stored at different times)
Activity Icons:
Select table icon
Previous Page icon, which is used to go to previous page in the region
Merge table function can combine 2 or more tables into one table.
Next Page icon, which is used to go to the next page in the region
Split table function split already combine tables back, effectively reversing the combined
Set Table status for for all table without status, e.g. set all table that's not currently used to be in preparation status and etc
Table Status setting icon which is used to set table status.
Unset all the table status
Eraser Icon is used to cancel the table status
Press on this icon to book a table
