Layout Manager
- Andrew Noakesmith (Unlicensed)
Main Screen
Control Panel
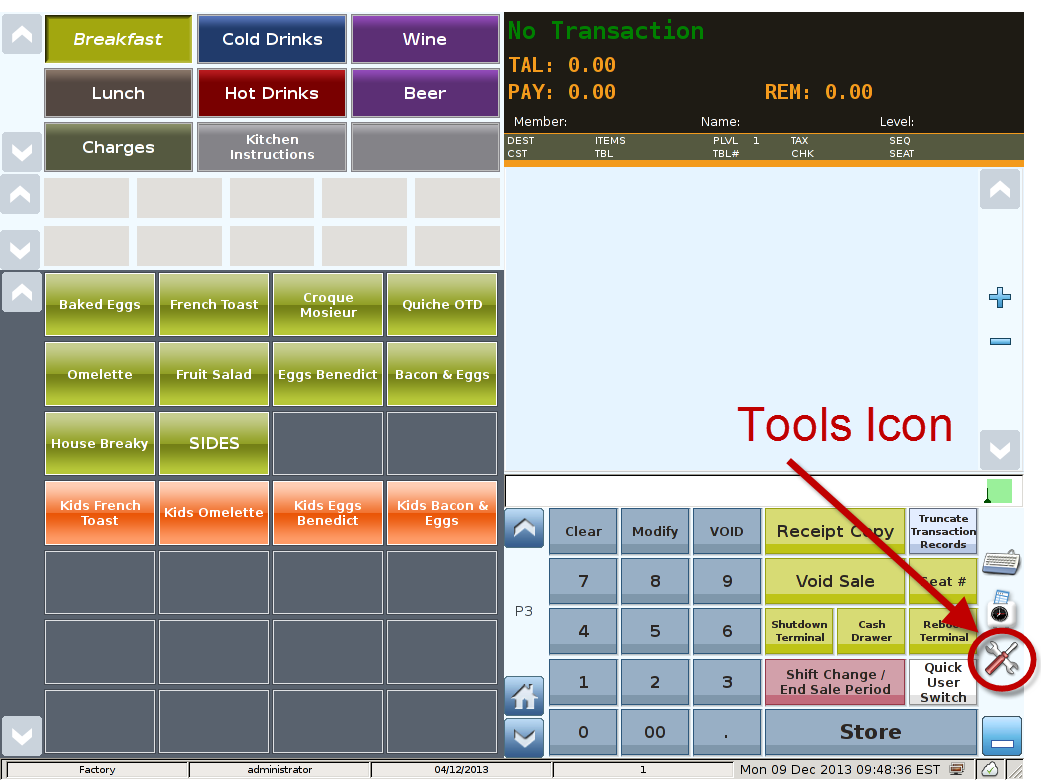

Select 'Tools' icon
to enter the Control Panel

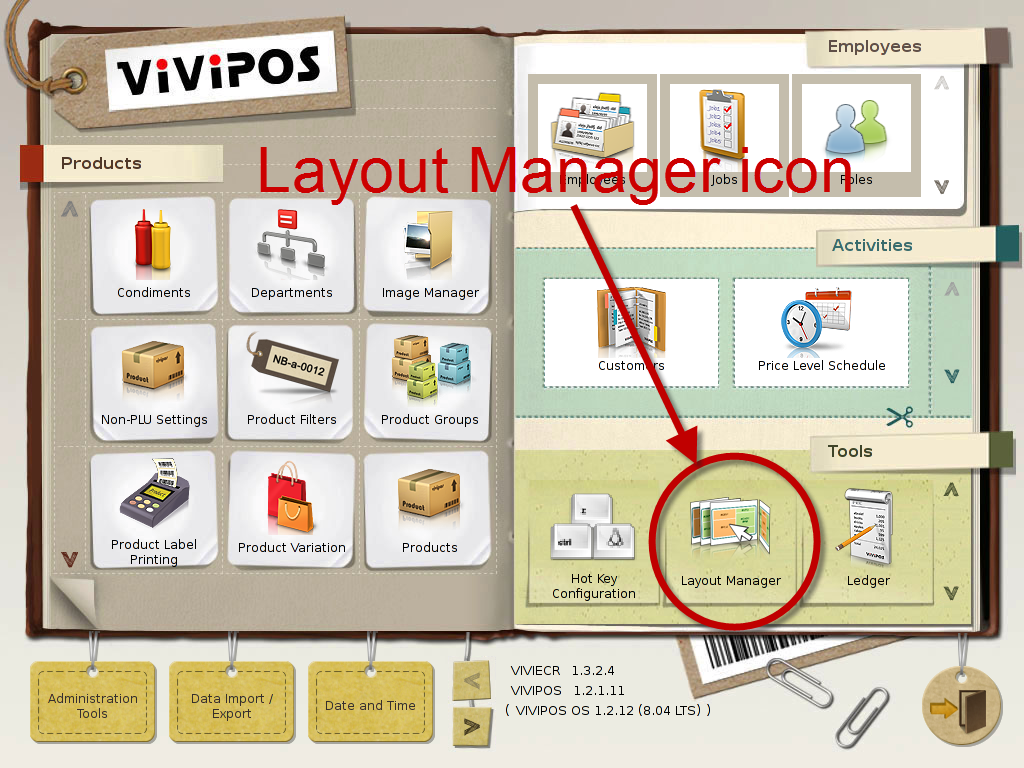
Select the 'Layout Manager' icon
to enter the Layout Manager Area
Layout Manager Area
Configure the Layout base on business type e.g. retail or restaurant
The Layout Manager screen contains 6 configuration tabs as illustrated below:
Tab 1(Panel Setting)
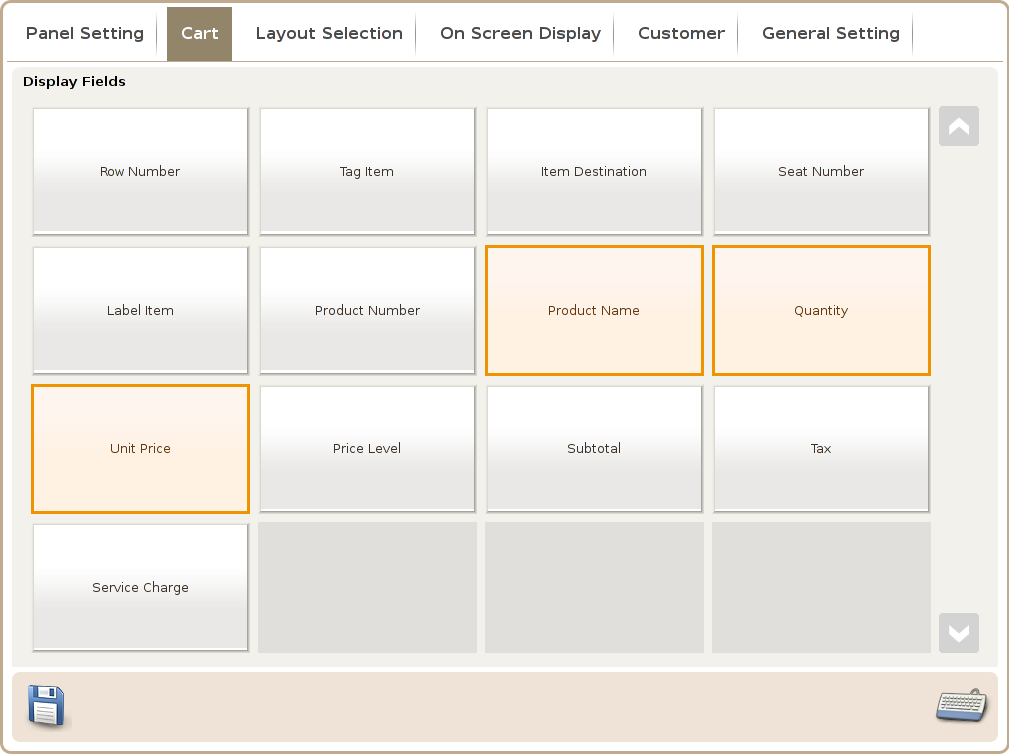
Tab 2 (Cart)
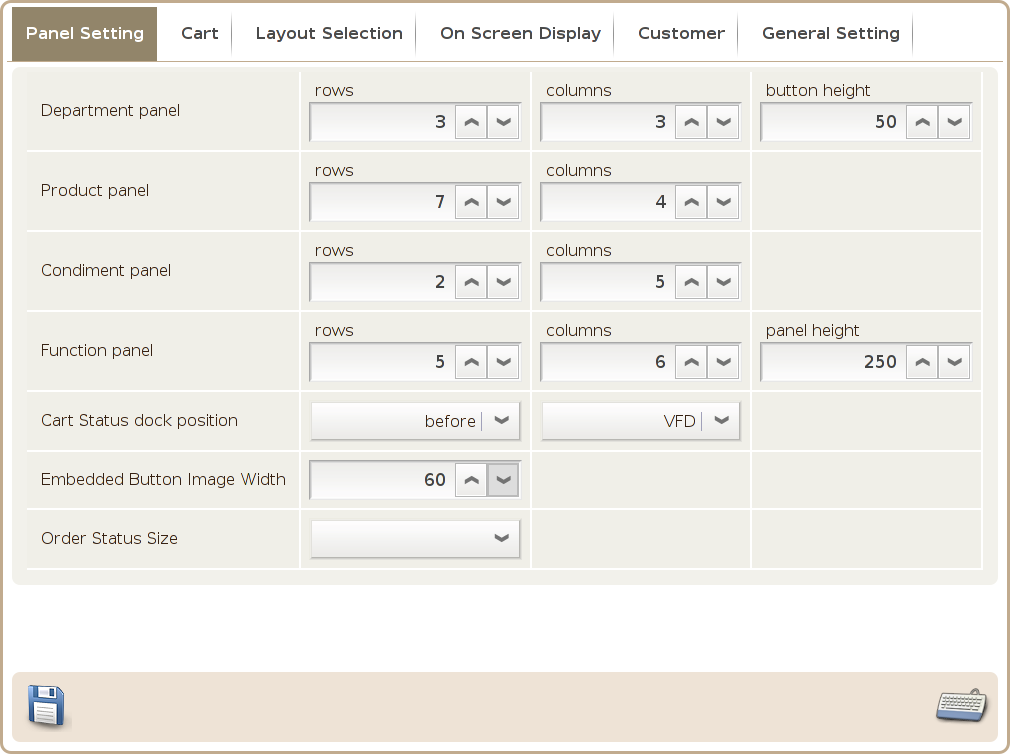
Department panel: You can define the rows and columns of the department panel.
Button height: You can define the height of the department button.
Product panel: You can define the rows and columns of the product panel.
Condiment panel: You can define the rows and columns of the condiment panel.
Function panel: You can define the rows and columns of the function panel.
Panel height: You can define the height of the panel height.
Cart Status dock position: Define the position of the cart status
Embedded Button Image width:
Order Status Size:
The available info to be displayed are
- Row Number
- Tag Item
- Item Destination
- Seat Number
- Label Item
- Product Number
- Product Name
- Quantity
- Unit Price
- Price Level
- Subtotal
- Tax
- Service Charge
Tab 3 (Layout Selection)
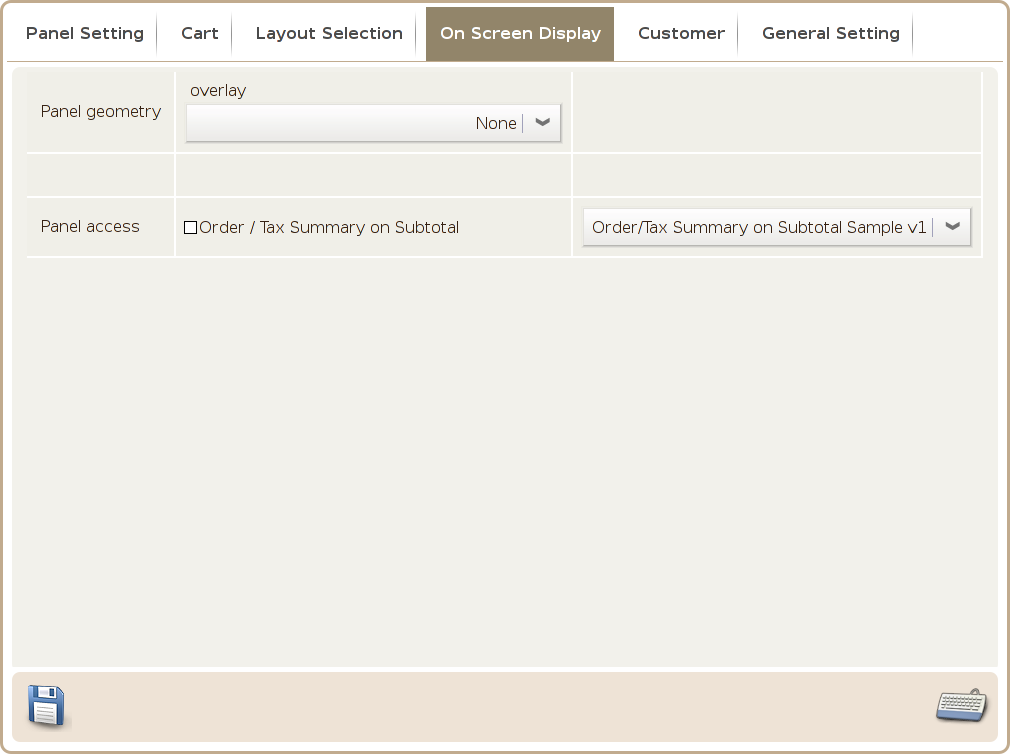
Tab 4 (On Screen Display)
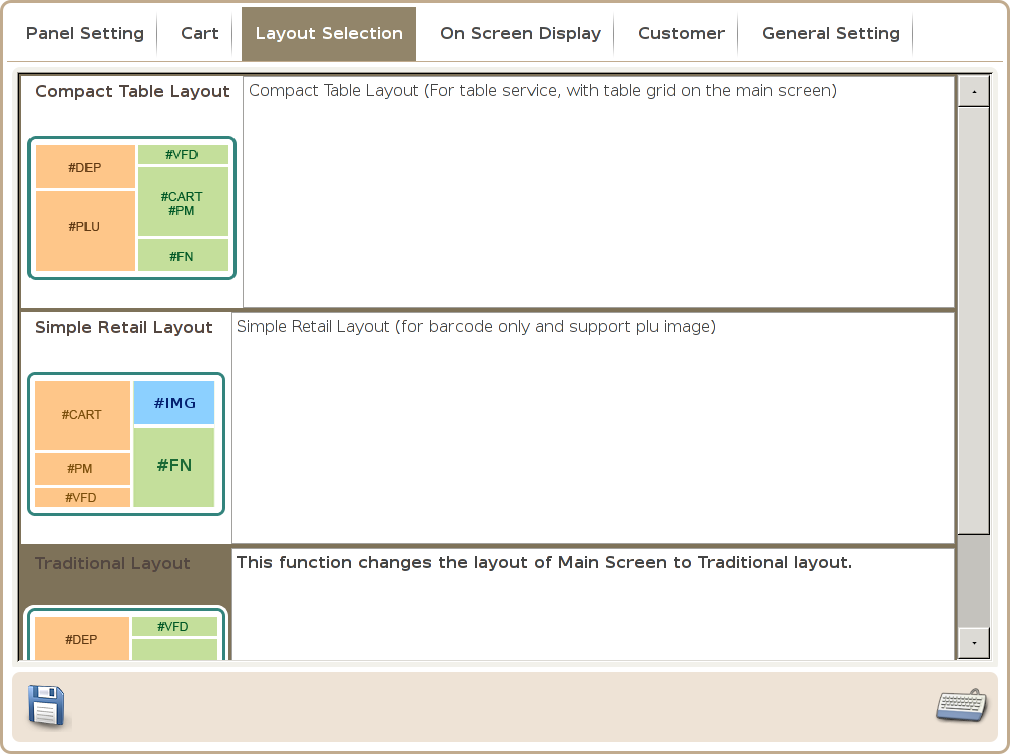
Currently the system has 3 default layout settings available:
- Compact Table Layout
- Simple Retail Layout
- Traditional Layout (default layout)
Tab 5 (Customer)
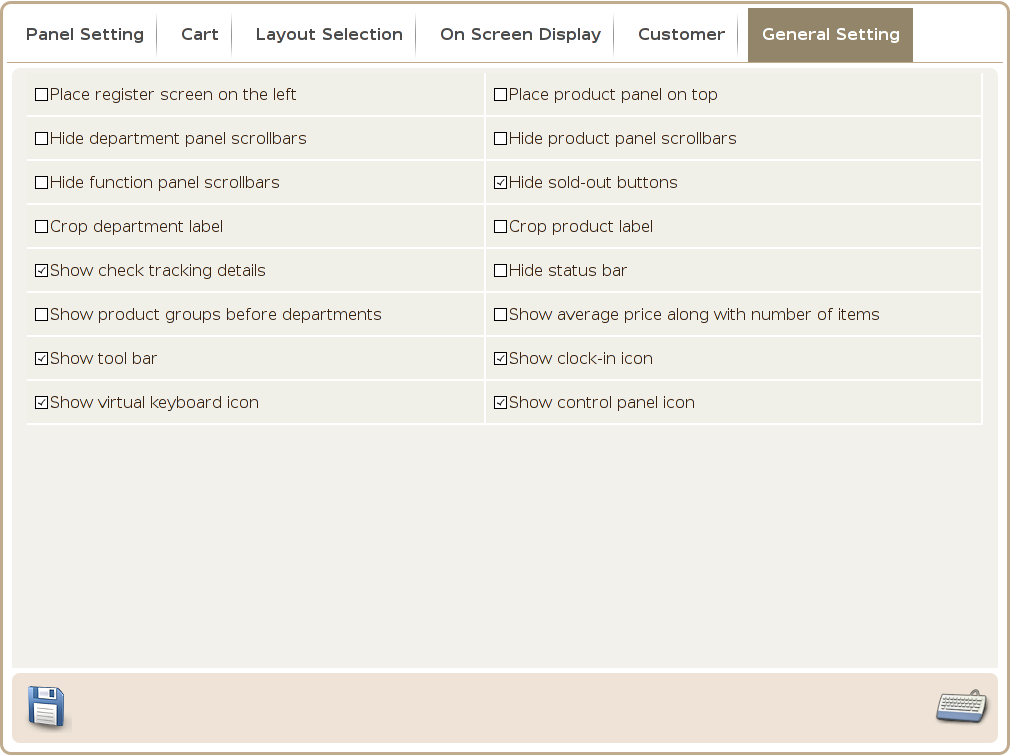
Tab 6 (General Setting)
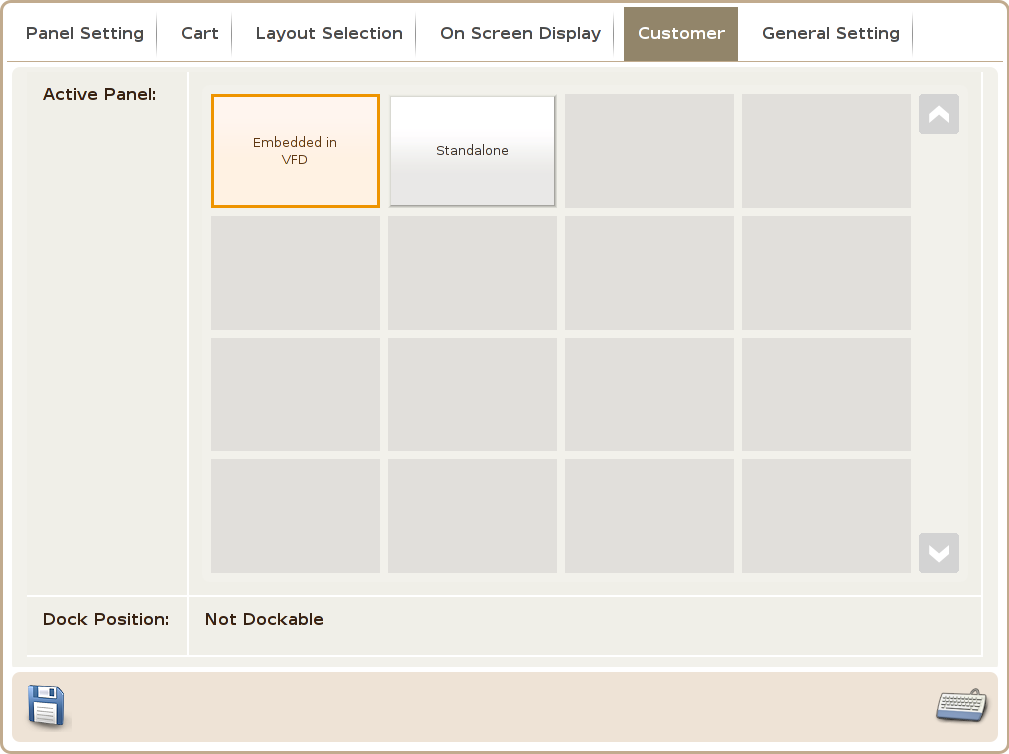
Embedded in VFD (The panel position can not be moved)
Standalone ( The panel position can be set before or after department/ product/ display/ shopping cart/ input row/ function panels)
Place register screen on the left: The default placement for the register screen (shopping cart) is on the right.
Place product panel on top: Enable this option to swap the default placement of product panel and department panel.
Hide department panel scrollbars: Enable this option to hide the department panel scrollbars.
Hide product panel scrollbars: Enable this option to hide the product panel scrollbars.
Hide function panel scrollbars: Enable this option to hide the function panel scrollbars.
Hide sold-out buttons: Enable this option to hide the sold-out button in the product panel scroll bar.
Crop department label: Enable this option and the department name displayed will not change line automatically to fit the department button, instead the label will be cropped, if too long.
Crop product label: Enable this option and the product name displayed will not change line
automatically to fit the product button, instead the label will be cropped, if too long.
Show check tracking details: Enable this option to display info such as table number and check number
Hide Status bar: Hide the status bar which is at the very button of the POS front end screen.
Show product groups before departments: Enable this option to show product panel before department panel.
Show tool bar: Enable this item to show tool bar in the POS front end (display next to the function panel).
Show clock-in icon: Enable this option to show the clock-in icon, in the tool bar.
Show virtual keyboard icon: Enable this option to show the virtual keyboard icon, in the tool bar.
Show control panel icon: Enable this option to show the control panel icon.