Data Import and Export
Data Import and Export
- Alen Marcic (Unlicensed)
- Andrew Noakesmith (Unlicensed)
- Eric Hui
Owned by Alen Marcic (Unlicensed)
Last updated: May 16, 2014
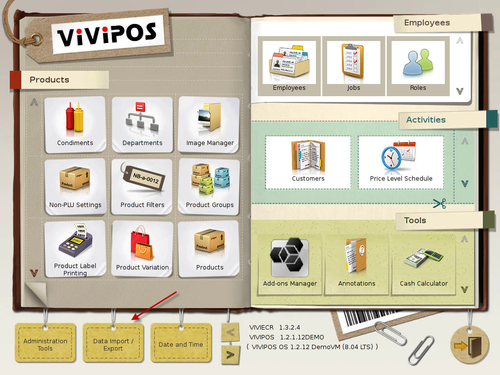
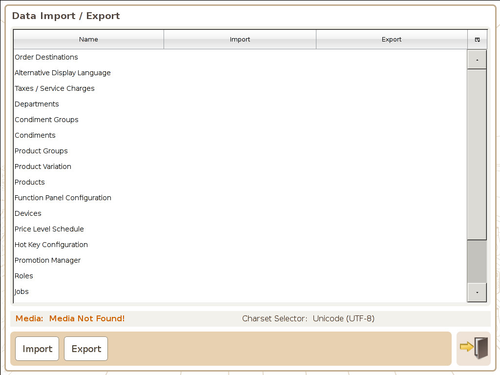
The Data Import/Export screen is used to import and export information such as departments, products, condiments, etc.
Data Import
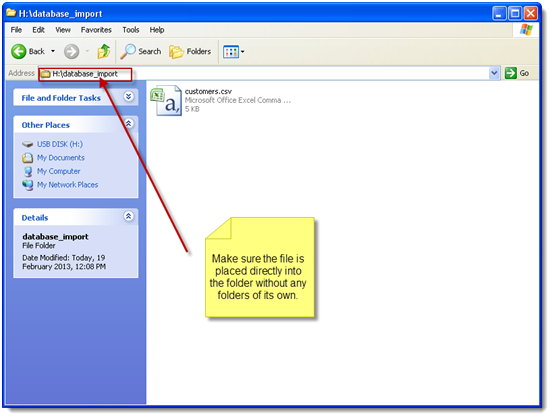
- You can import data (previously exported from the ViViPOS terminal), eg. ‘customers.csv’ by placing it inside the database_import folder in the root directory of the USB media.
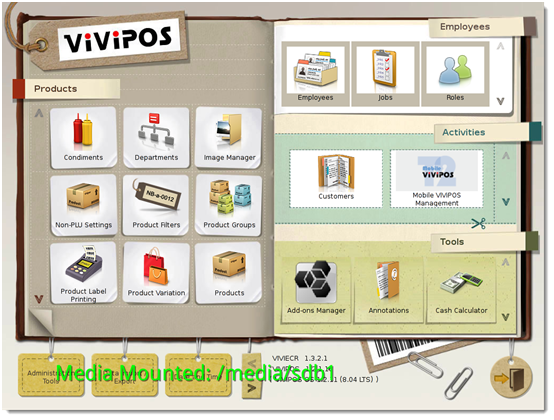
Insert the USB media into one of the USB port on the ViViPOS. A green highlighted text will appear indicating it is mounted.
Simply select the file you wish to import, and click on Import. A confirmation prompt will be shown once import is completed. You will also see a YES at the selected data file line.
Note: When importing multiple data files, always start from the top to the bottom as some files requires certain data on the ViViPOS before it can be imported. Eg. You will need to import Department before Products if it is a new system, as all Products belong to a Department.
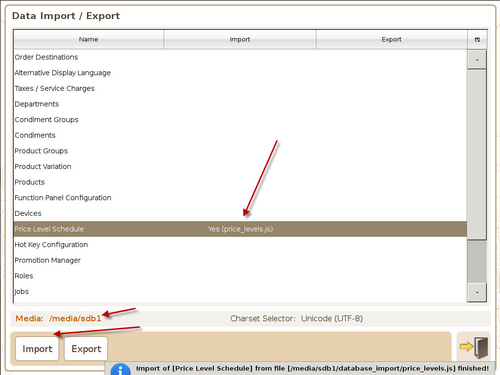
Data Export
To export a data file from the ViViPOS, after a USB media is detected, simply select the file you wish to export and click Export. Once completed, you will see YES displayed for the selected data file.

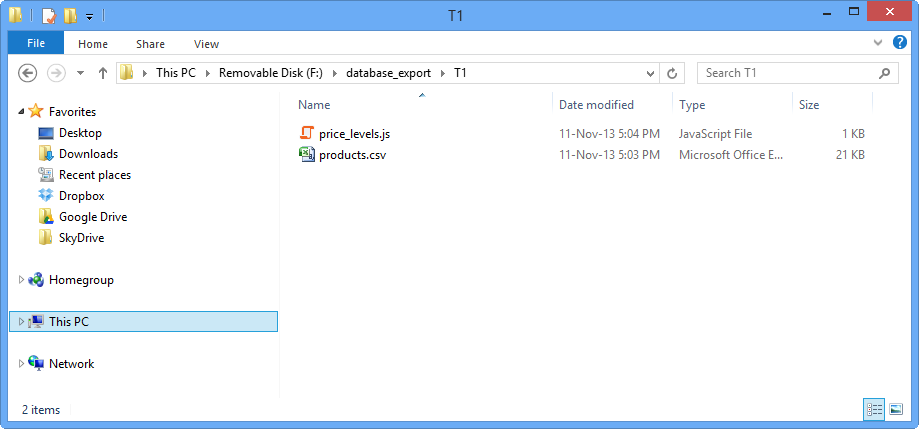
- Once the data file is exported, you can find it under the database_export folder on the USB media. Note: The data files will be contained inside another directory with the name of the ViViPOS Terminal. In this example, the terminal is named T1.
, multiple selections available,