Networking Multiple ViViPOS Terminals
This section shows how to synchronise multiple ViViPOS terminals on the same local network.
It is helpful for the following reasons:
- Your networked terminals can share some data, such as Table Service or Stock Control Service information.
- You can perform updates on one machine (The Master) and send them to any of the others. (either all or specific groups)
- Updates can be scheduled for a future date and time.
- Reports can show consolidated data across all terminals in your network as well as by terminal.
- Even though the networked terminals may have the same Departments & Products they can be configured individually (eg the Bar Terminal may only display Drink and Bar Food Departments and the Bistro Terminal would only show Buffet and A La Carte Departments)
Detailed information about specific fields in the Network Services module can be found Here
Main Screen
Control Panel
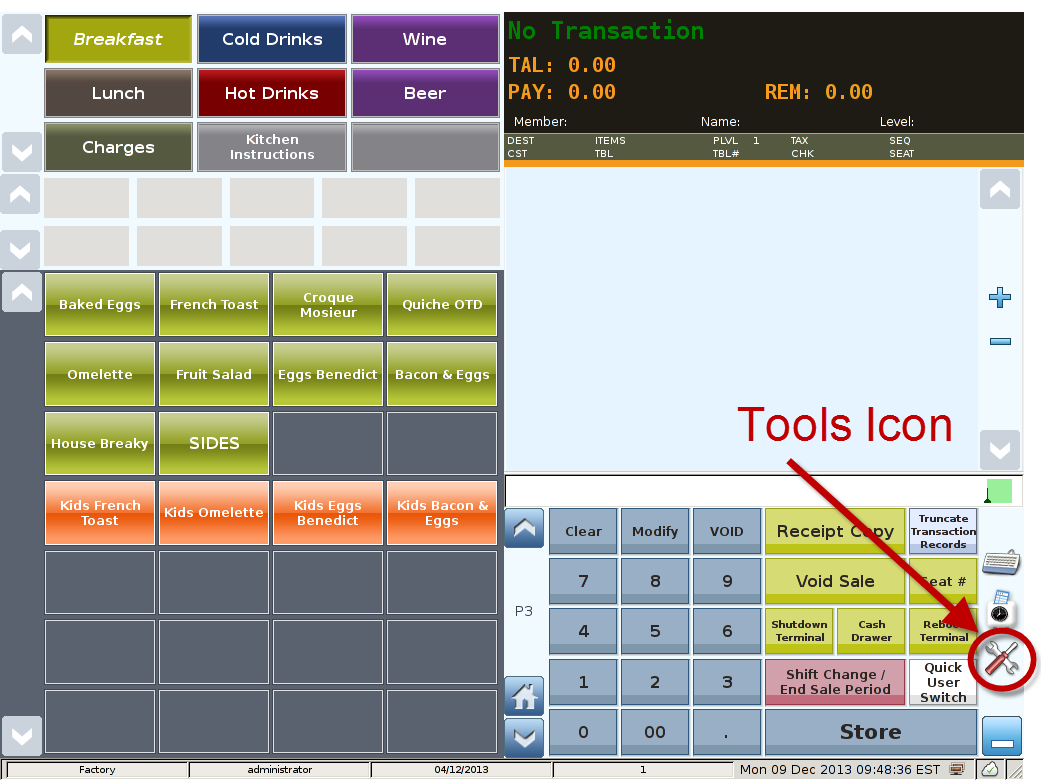
Select 'Tools' icon
to enter the Control Panel
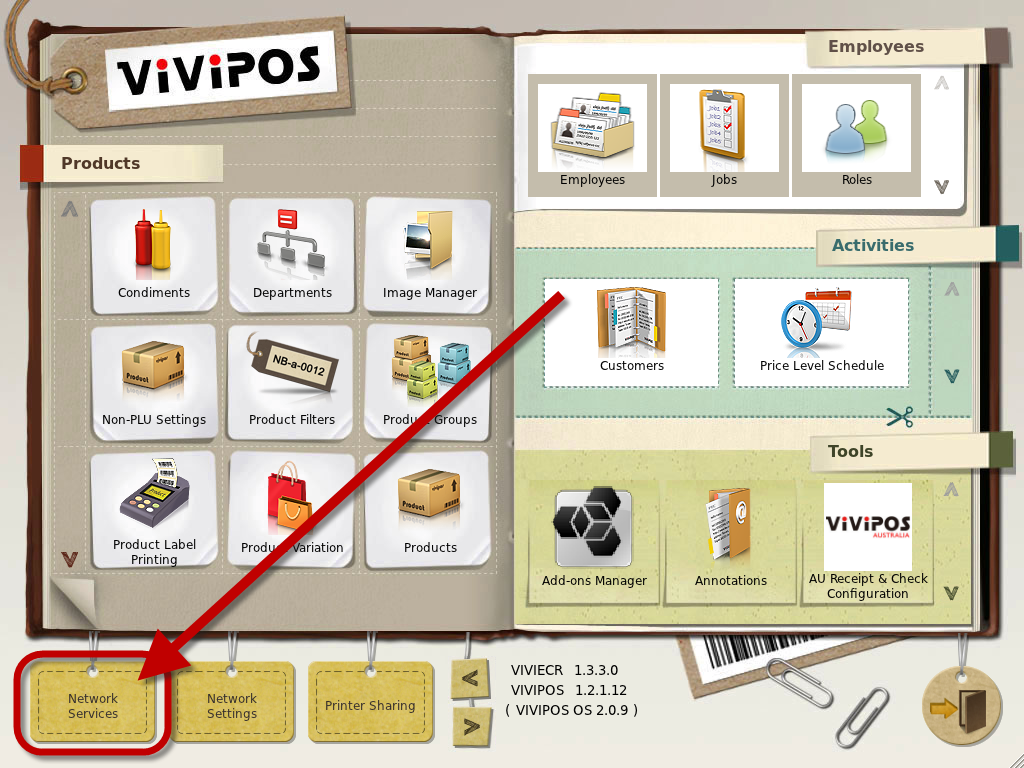
Select the 'Network Services' icon
to enter the Network Services Area
Below are the settings for a typical Hospitality Business that allocates orders to tables and has one master terminal and one or more slave terminals
Master Terminal
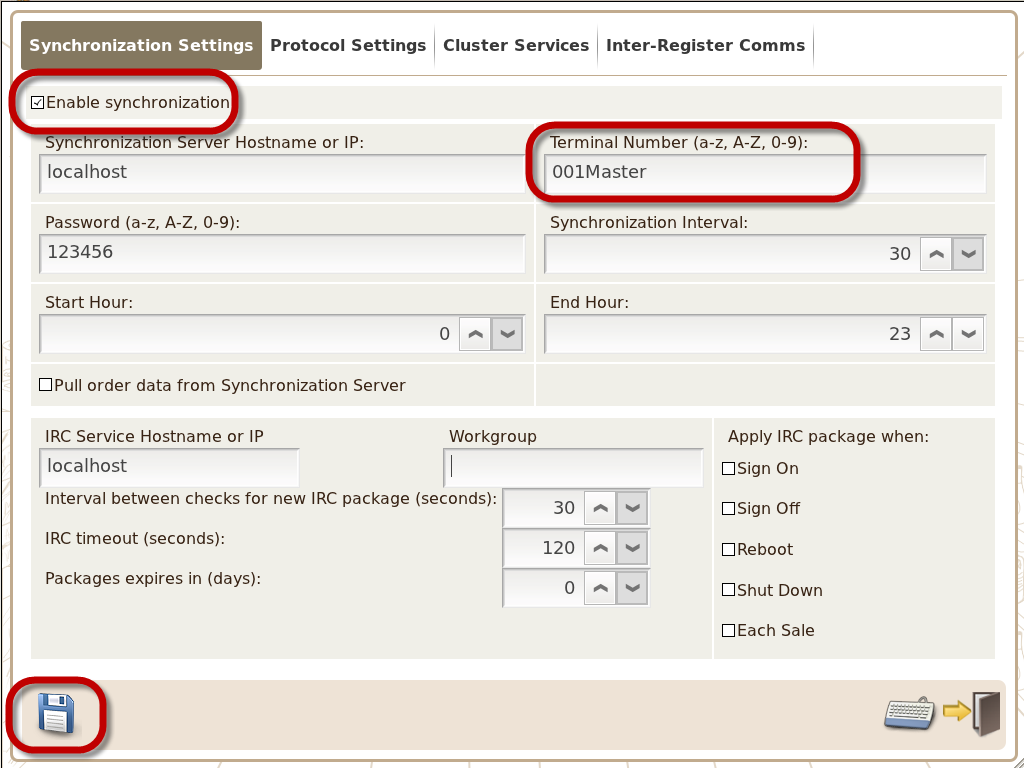
Tab 1. Synchronization Settings
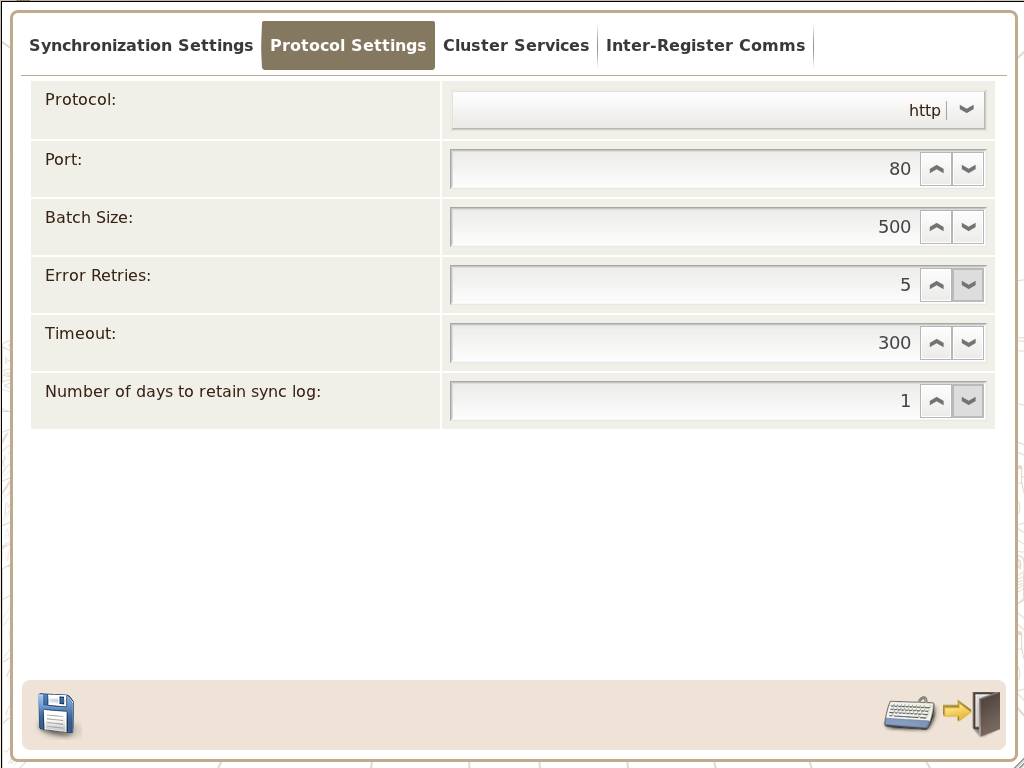
Tab 2. Protocol Settings
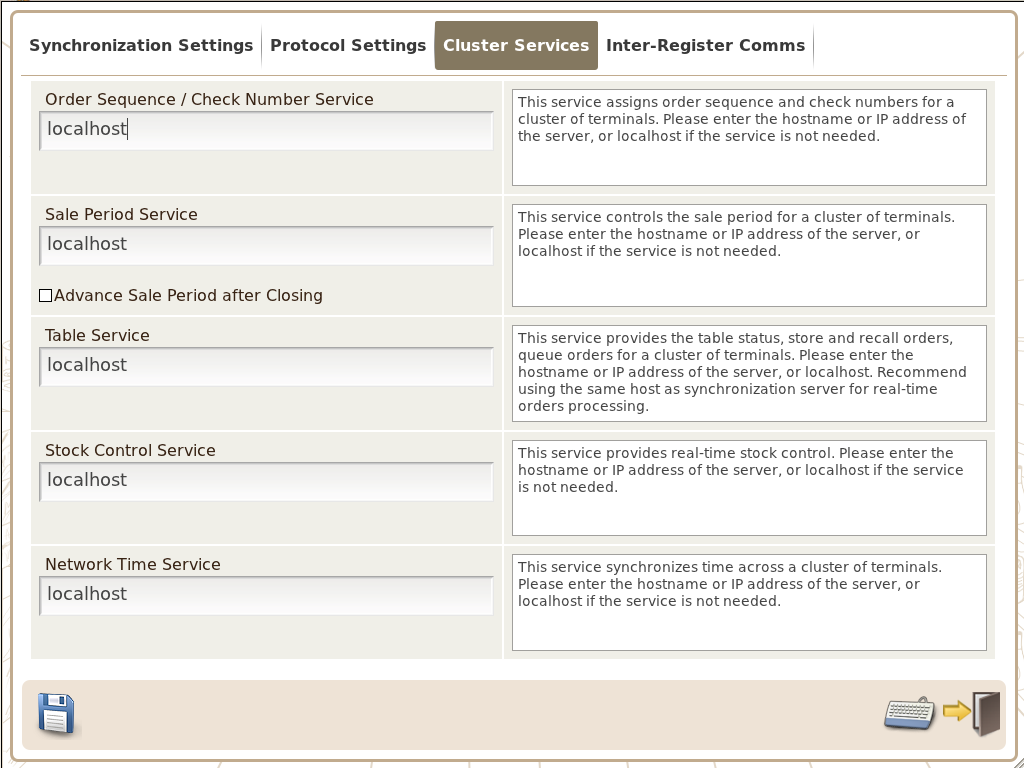
Tab 3. Cluster Services
- Tick the ‘Enable synchronisation’ box
- Allocate Terminal Number (in this example we have used 001Master)
- Generally 'default values' can be left as above
- Leave 'default values' as above.
Slave Terminals
Tab 1. Synchronization Settings
Tab 2. Protocol Settings
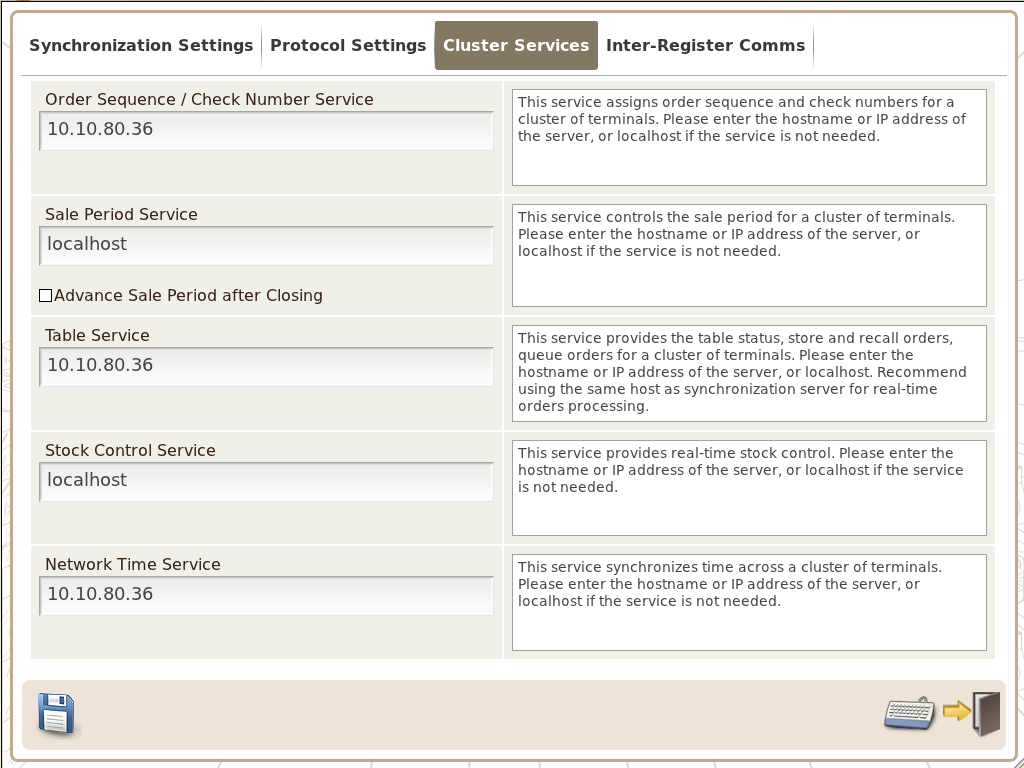
Tab 3. Cluster Services
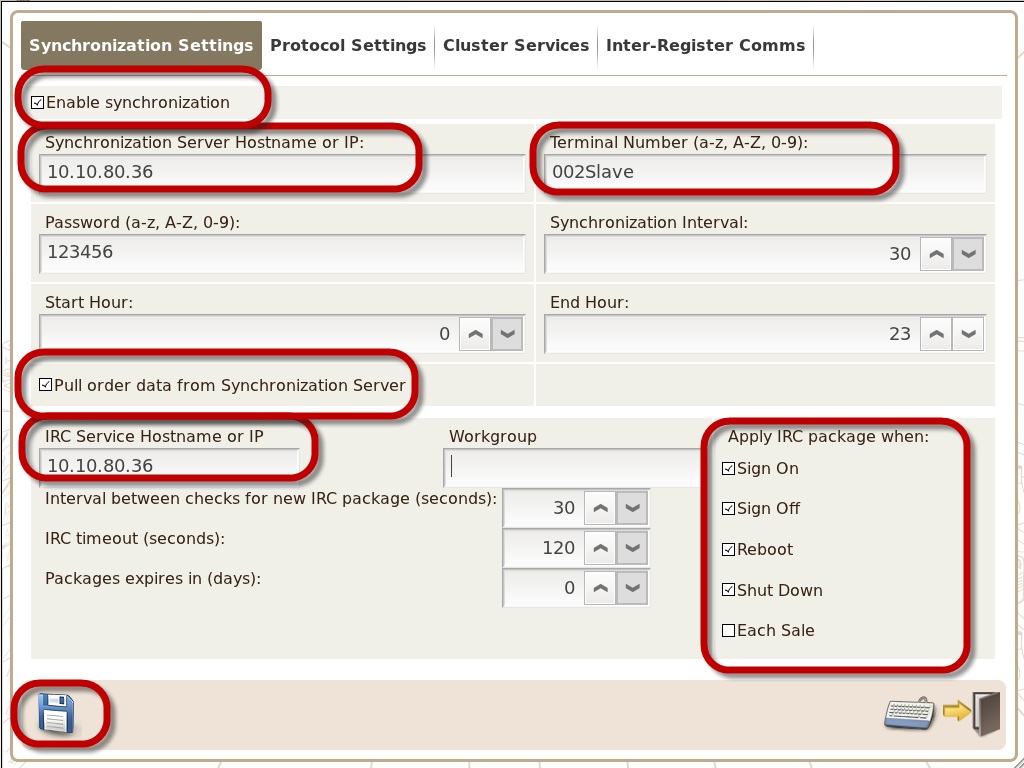
- Tick the ‘Enable synchronisation’ box
- Enter IP address of Master Terminal in 'Synchonization Server Hostname or IP' field (in this example we have used 10.10.80.36)
- Allocate Terminal Number (in this example we have used 002Slave)
- Ensure password matches that in the Master Terminal
- Tick the ‘Pull order data from Synchronisation Server’ box
- Enter IP address of Master Terminal in 'IRC Hostname or IP' field
- Tick boxes below 'Apply IRC package when:
- Sign on
- Sign off
- Reboot
- Shut Down
- Save settings by clicking icon
- Generally 'default values' can be left as above
- Enter IP address of Master Terminal in:
- Order Sequence / Check Number Service
- Table Service
- Network Time Service
*Note:
1.Different setting may apply depending on the type of business. Contact your Authorised ViViPOS Dealer for suggestions and recommendations.
2.For 'Slave' terminals that do not take payments tick the 'Disable sale period' box located in 'General Options' under 'Shift Control' (shown below)
.
